Demystifying Control 2
What’s in an Interface?
Often at Apogee when we’re talking about interfaces we’re talking about the physical devices that bring audio into a computer, this time around we’ll focus on software interface; particularly Control 2.
With so much functionality and flexibility, at times it can be overwhelming looking at buttons without knowing their precise function or seeing meters without knowing what they’re showing.
In this blog entry we’ll help you get the most out of the software, detail workflows and provide some useful tips to best suit your preferences.
CONTROL 2 BASICS: LAYOUT AND MONITOR SECTION
First let’s look at layout. Rather than trying to make sense of everything at once there’s a few sections of the interface that are super useful to segment:

Monitor and Output Controls
The Monitor/ Output section is a great place to start as no matter what we’re doing this stage will be used. Inside this section you’ll find multiple knobs, as every Apogee device it’s used with will have both a Headphone output and a Speaker Output. Adjusting volume is independent between the controls and both have Mute (M), Dim (D) and Sum to Mono (Σ) options.
Muting will already feel familiar from your TV remote but can be particularly handy if something starts creating unpredictable noise and you want to cut the sound to ensure your speakers aren’t damaged. A great trick for mute is to hold the encoder knob on your physical apogee interface which will turn on the mute feature.
What is Dim and Sum to Mono?
Dimming may be less familiar but can be really useful if you are playing back a track with a collaborator and want to talk while listening, this reduces volume temporarily and toggles right back to the previously chosen volume level. Finally the mysterious sigma button Σ: this is used for Sum to Mono. The concept is simple, combine the stereo signals so both speakers receive the same signal.
While mono compatibility is no longer the concern it was in the era of the Beatles and Beach Boys, it can still be a useful tool to see how a mix may translate in a less than perfect environment. For example you can make sure a stereo widener isn’t weakening the impact of a synth or that mid side processing isn’t making the mix weaker.
ALL IN
The input section sports some very robust features that may not be immediately intuitive. Here we’ll find things like input type which are critical to ensure the source we are connecting is seen by our interface as well as gain to adjust levels appropriately, if you need more guidance on this topic, please check out our Complete Beginners Guide to Audio which will help you learn everything you need to know to get started.

Grouping Channels for Stereo Recording
Beyond setting appropriate levels, we’ll also find a Group button shown by a knob icon, this feature groups inputs 1 and 2 together, especially handy when using a stereo pair of mics such as is commonly used for overhead drum micing or pianos. The feature links the gain knob so both receive the same incremental adjustments for gain. If you want to take this a step further the mixer section allows stereo linking which also allows for FX settings to be shared.
Fixing Phase Issues with the Polarity Switch
Speaking of techniques involving 2 mics, another useful feature is the Polarity Switch (ø) which can be extremely useful in a pinch. Phase issues occur when audio traveling from two sources create cancelling combinations (AKA one wave form goes up when the other goes down) with a resulting thin hollow sound. There are a few ways to deal with this. Sometimes the solution may be obvious, for example experienced ears often pinpoint a hollow midrange quality and adjust mics accordingly.
For the unexperienced, an easy check is toggling the phase switch and monitoring the audio or record a test clip. If it’s in phase, flipping the switch will result in a noticeably weaker thinner sound with less bottom end, if the opposite occurs you can either keep this setting or move the mics 2- 5cm towards or away from the source and put the phase back to normal and retest to correct the issue.
WHY IS THERE A MIXER IN CONTROL 2?
Just like at a concert venue where the Front of House engineer determines the sound coming out of the PA but a singers monitor may have a different mix, virtual mixers allow a slew of alternatives, helpful for a number scenarios.
Direct Monitoring Explained
One example where this comes in handy is Direct Monitoring. This allows you to completely avoid latency. Latency is the time it takes for sound to travel. In the context of audio interfaces, this involves the interface communicating to the computer back to the interface then to headphones or monitors.

Depending on your computer, and buffer size settings in your DAW this latency may be experienced as an audible delay from when a sound is made to when it is heard. To totally eliminate this as a problem, Control 2 features an internal mixer and on board Digital Signal Processing (DSP) that gives access to a full channel strip like you’d have on a studio board. Along with enhancing the character of the sound it also eliminates the time needed to turn sound into ones and zeroes. Sound goes direct from the source to the interface to headphones, resulting in nearly zero latency. This ensures your performance isn’t negatively impacted.
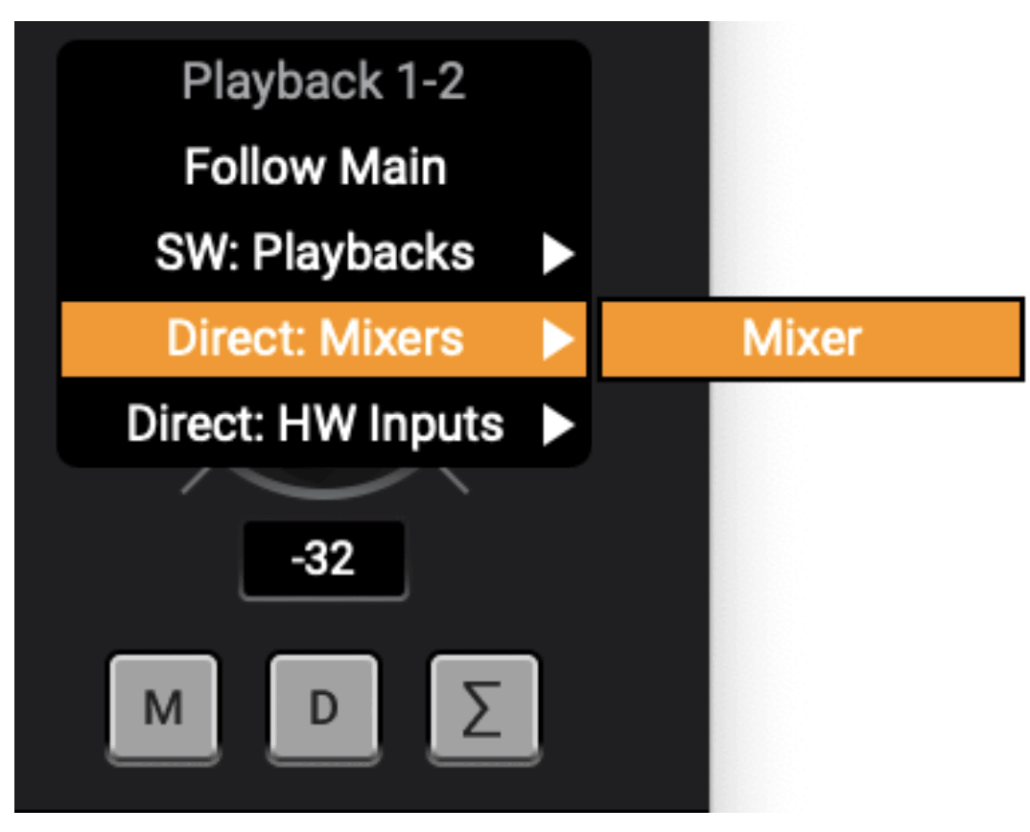
To set up this feature, select the output for Headphones or Monitors and choose Mixer.
Using Loopback for Streaming and Content Creation
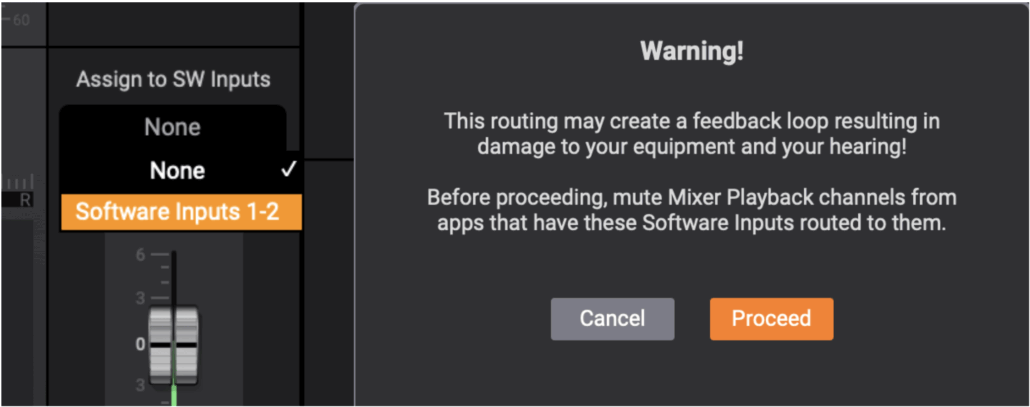
One of the coolest features inside the mixer section is Assign to SW Inputs. This feature enables loopback. This allows your audio to combine software playback and analog inputs. This is great for those doing live streaming, recording reaction videos for Youtube, or even adding some background music to a Zoom call with audio that’s actually intelligible.
You’ll notice that with this setting engaged you’ll see a popup launch about avoiding feedback. When using loopback you’ll want to avoid using input monitoring which would make the output combine with input continually. In this mode you’ll also want to ensure that monitors or headphones are using the direct mixer routing.
HIFI AUDIO LISTENING WITH LOSSLESS
While the sidebar is likely not something you interact with regularly, there are a few features worth noting. Sample rate is one. As your DAW is likely configuring and overriding these settings, what’s the point? Well, a great example is streaming music.
Adjusting Sample Rate for Streaming Services
Many who own these interfaces may not be aware that if you use a streaming music service such as Apple Music and Tidal, you can choose higher fidelity lossless music. By engaging a preference for lossless or FLAC and ensuring your interface is in the right sample rate, you can upgrade your day to day listening experience. Sweet!
Here’s some more specifics on both if you’re curious:
Another cool feature here is the Mixer View button. By default your Apogee interface will show a layout with all available features. If it’s uncommon that you use direct monitoring or loopback, you may prefer turning this feature off, thus providing more space to view meters for inputs.
Customizing Mixer View and Meter Preferences
You’ll also find preferences on how meters act. While the default is set to 2 second holds for both peak and level some users may prefer seeing these at infinite settings if for example, you are not at your computer when tracking vocals. In this scenario, input levels need to be tested, then the user can come back to the computer to check for level and clipping. Make sure to use the Clear Meters button in the toolbar between attempts.
On the other hand, are you the kind of person who gets bothered when your text message app shows a number in red? You may prefer a setting in Control 2 that feels less alarming considering when mastering or listening to existing music, output meters will commonly touch zero. In that case, setting these to off still provides metering without keeping things showing red.
CONCLUSION
Thanks for taking the time to learn how to make the most out of your workflow with Control 2. Armed with this knowledge we know you’ll be better equipped to make the most out of your recording and mixing workflows. Stay tuned for more useful tips coming soon.
Sincerely your Audio Copilot,
Apogee Electronics