The Complete Beginners Guide to Using Desktop Audio Interfaces
Everyone comes to recording in different ways, for some of us the goal is just to write songs and demo, or to practice with other instruments and get better. Other times, getting started with recording turns into a passion that leads to an obsession, similar to how we treated learning an instrument.
No matter how you got here, welcome and thank you for investing in yourself. Whether you are just getting started recording or upping your game from other interface brands you’ve grown out of, we’re thrilled you decided to do it with us and we’re proud to be your copilot.
UNBOXING
Congrats on your rad new audio interface!
Here’s a few essential steps to get the most out of it and get things working. While this can be easy to skip, it really is essential.
Get your needed Software
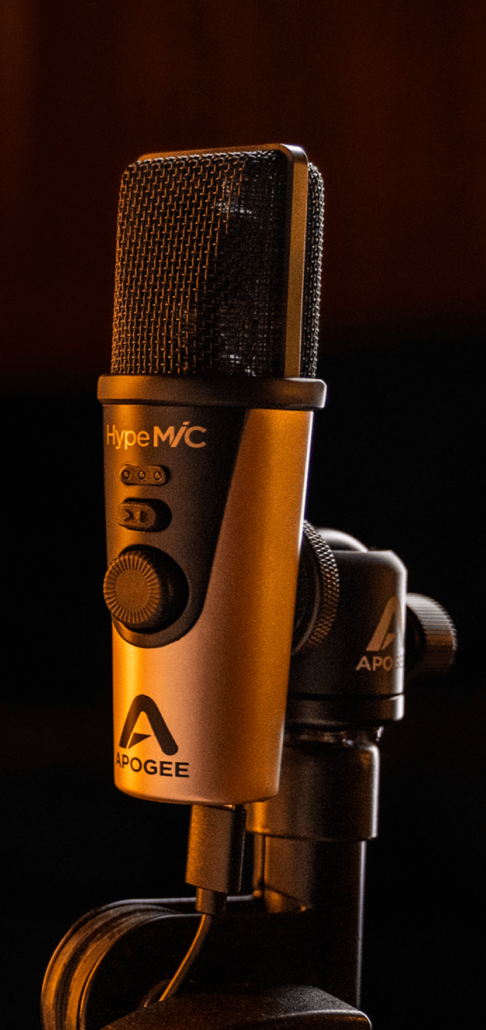
- Control 2 (Takes care of levels and input settings)
- Interfaces come with FREE plugins (things that help your recordings sound even better)
- Software Trials and DAW software (Digital Audio Workstation AKA the software that helps you compose, record, mix and arrange audio)
HOOKING THINGS UP
Right! So now you’ve got the software you need, let’s get things connected.
The first thing we’ll need to know about is inputs vs outputs. Sometimes these can be easy to confuse so the best thing to do is visualize where the sound is coming from and going to.
For example if you’ve used an electric guitar before, the jack on the instrument is called an output jack, that sends the signal from the guitar to the amplifier.
If you’ve used a mic before, you made sound which was picked up by the microphone and output to speakers after going to a sound board.
On your interface both the guitar and mic are considered inputs but their signal types are different, meaning you’ll need to choose different settings.
ALL ABOUT SIGNAL TYPES
Commonly the connections we deal with in pro audio are XLR and 1/4” connections. While the jacks and cables look distinct, there are a few things that can feel confusing as you’re getting going. XLR cables are typically used for microphone signals but can also be used for line level signals as well. The most common example is connecting recording monitors (studio speakers) where this is often the preferred connection.

Interestingly enough 1/4 inch cables have 2 types which look very similar but are used for very different purposes. Below is an instrument cable used to connect guitar, bass and synthesizers to amps or interfaces:

The other type of cable is known as a “balanced cable” used instead for connecting to speakers or routing sound between professional audio equipment such as analog outboard processors, mixers, or consoles. Shown below, this cable has an additional “ring”:

While they look similar, the balanced cable and unbalanced cables are quite different and will not produce the intended result when used in place of each other. You’ll likely hear people refer to balanced cables as TRS and unbalanced as TS.
GETTING SOUND
Now that we have a lay of the land with cabling, let’s connect stuff and get creative.
First up let’s handle output, which likely will be pretty simple.
Headphones
If you have headphones, connect them to the headphone output of your interface. Apogee gear is pretty unique in that the headphone outputs are not an afterthought, rather a strong focus. So no matter whether your headphones are consumer or professional, high or low impedance, big or small, you can trust they’ll work well, provide enough output and provide as detailed and clear a performance as possible.
Speakers
If you’re using monitors, you’ll either be using 2 x TRS to TRS 1/4” Cable or 2 x TRS to XLR cables.
When connecting monitors, it’s a good idea to keep monitors powered off as click and pops could damage the speakers. Once things are plugged in feel free to power them up. To control the level you can either use the “encoder” knob on your interface with the output setting is selected or you can do this inside the Control 2 software. It’s a good idea to be aware of the output level so you don’t accidentally start at full blast. If you are working on a Mac you can also control this volume via the keyboard volume shortcuts when your interface is selected as the output.

Now that you have output, you’ll be able to hear sound playing back from sources like your recording program or music playback software.
For some folks doing beat-making, you may only need to go this far, if you need to take in sound sources such as instruments or microphones, please read on.
SETTING GAIN
When it comes to inputs, the whole idea of an audio interface is to take analog signals and convert them into digital, as pleasantly as possible. This has been Apogee’s specialty and prowess since 1985.
In order for this process to work as expected we need to make sure that levels are set appropriately. Imagine putting data on a piece of graph paper going from 1 to 100, if the data we need to put down is all between 200-250, we’re going to have trouble. When we set gain, we’re making sure that things are in range and more importantly making sure what’s happening is well represented.
One of the easiest ways to set levels is to play a source at its maximum level and ensure this is just below clipping (hitting red on the meters).
What does maximum level mean? Well on an acoustic guitar strumming hard repeatedly on open chords, on distorted electric guitar hard palm muted chugs and on voice a full force belting or even shouted or screamed phrase. You don’t have to hit so hard you break guitar strings, drum heads or hurt your vocal cords before even starting, but we do need to establish the top range to prevent unintended distortion or other problems that will make your recordings sound less professional.
By ensuring these maximums don’t create “overs” you can ensure that getting excited performing in the moment doesn’t cause problems.
SETTINGS BY TYPE
Asides from connecting our mic or cable to our input, there’s another step needed: telling the interface what type of signal we’re working with.
Essentially there are 3 types here and a couple of subcategories.
- Mic
- Instrument
- External Mixers and Pro Audio Gear
The reason this matters is that your audio interface will treat these signals differently based upon this setting. For example, with mics the signal will hit a microphone preamp that not only imparts a character to the sound but also ensures the rather minuscule signals are correctly amplified to sound as we expect them.
In the case of instrument inputs, we put a lot of attention towards converting these signals into a “DI” signal that will sound full and convincing when using them with amp simulations.
Finally; standard pro audio gear. This includes things like external mic preamps, or things like mixer outputs (handy if you’re using your interface to capture a live performance from the Front of House sound guy). On all Apogee desktop interfaces, line level inputs must use XLR connections (Boom is an exception). Please note it is important to the safety of this third party equipment that phantom power settings (described below) are not engaged with this type of connection. While some modern equipment has safeguards to protect against this connection error, it should be avoided to prevent damage.
This type of source has a level determined by device it’s coming from. As such rather than a gain knob, the line level settings are either +4dBu or -10dBV. If those numbers sound a bit like gibberish, the easy way to think about it is +4dBu is the likely setting for pro audio gear, the -10dBV is more common in the consumer world, examples included home stereo system outputs, CD players etc.
The type of input is adjusted via Control 2 labelled as “Analog Level”

3 TYPES OF MICS
While “Mic” is the correct choice for any microphone being hooked up directly to your recording interface, there’s 3 different types of mics worth learning, as they can help you ensure you hear sound and importantly don’t damage any of the equipment bought with your hard earned money.
Dynamic Mics
Dynamic mics are the most common things that come to mind for those just entering audio. If you’ve ever done a public address or sung Karaoke, these are what you’ve interacted with. Dynamic mics sense sound and pressure turning it into an electrical signal that moves through a cable. Dynamic mics do not need any additional power. For mics like the Shure SM7B, non Apogee interfaces often recommend using a Cloudlifter to boost the signal these mics produce as mic preamps need to be very robust to amplify it. Even with our least expensive interface Boom, you only need to select the mic setting. You’ll have plenty of gain to get good levels and sound.
Condenser Mics
Another common studio staple is Condenser mics. For these types of mics, power needs to be sent to the mic (Called 48V or “phantom power”) before sound is heard. These mics are very sensitive to the environment so it’s especially important that background noise is minimized where possible.
To use a condenser mic, you’ll need to turn on the 48V button underneath the gain setting in Control 2 software using the mic setting. It may take a bit of time for the mic to start making and registering sound, once it does, you can change the gain to reach appropriate levels.
Ribbon Mics
Finally Ribbon mics are another style, these mics are often affected negatively or even harmed by phantom power, so it’s important to check these features are disengaged before connecting them to your interface. Ribbons commonly have a low output but with current Apogee interfaces, you won’t have issues giving them enough gain.
SPECIAL SAUCE
As a company that’s championed digital audio for 4 decades, there are a few extra tricks we have up our sleeves.
In Control 2 you’ll find a number of clever features that can enhance what you’re recording.
Soft Limit
Soft limit is a feature that can act as a great safety net around level setting. The feature prevents digital “overs” and thus can be a great safeguard to ensure that if a mic is moved or the performer’s distance changes during the performance these don’t result in undesirable distortion. Soft Limit is either on or off on the majority of Apogee interfaces however where more control and flavor is desired, Soft Limit is now available as a plugin.
Effects Processing
Another great feature to enhance recordings is the FX button found within the software. This button allows for source signals to be sweetened with digital processing that happens on the interface. This varies a bit between interfaces but often includes a channel strip such as ECS Channel Strip, which puts basic studio classic tools like EQ and Compression within reach. When tastefully adjusted, these provide a different level of polish to the sound and can be especially useful when paired with live-streaming setups.
CONCLUSION
With this information you’re well equipped to use your new interface and start sounding pro!
Audio is a passion that often times pushes us outside our comfort zone and skillset in order to achieve our artistic vision. Feel free to re-read this article as needed and be on the lookout as we dive further into sound sculpting and more advanced features in the future.
Sincerely your Audio Copilot,
Apogee Electronics